
My problem is that the circle is just not neat enough for my taste. There are holes and spaces between the stitches that I just can't seem to get rid off. Here are my alternatives. If you know of a better way to start the center of a circle - PLEASE LET ME KNOW!!
- Emily Ocker's Circular cast on.
- This swatch is done with 5 dpns. Look at the stitches right around the center.... they are so far apart.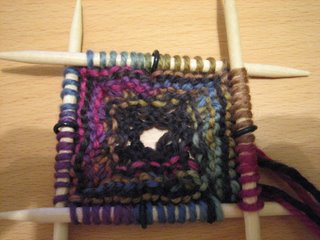
- This swatch is done using magic loop. Again, look at the center where the arrows point. WTF??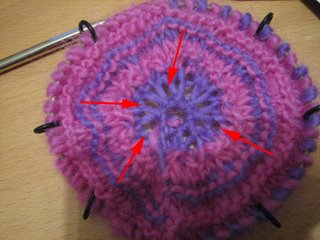


- Queen Kahuna's Aloha cast on. (Thanks Carla and Martha!!)
- I'm not sure if I like the weaving thing going on in the center. There are still holes. Emily Ocker's cast on is cuter I think.... more like a flower with a circle center.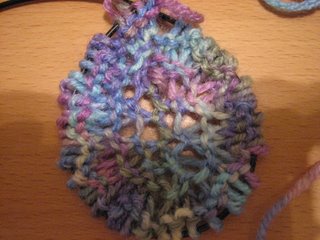

By the way, which of the circles above do you like?


4 comments:
I have also been planning to try casting on with smaller needles. I'm also going to try casting on fewer stitches.
So far, I think your Emily Ocker cast-on looks the best. I'll letyou know if I come up with something better. Sorry you're out there on the cutting edge all alone!
I did the regular starting way that Annie has in the instructions (using the Make 1 Away/backward loop/twisted yarnover increase), and it came out with a giant, horrid looking hole. HOWEVER, after I wove the tail through those central stitches, it looked fine.
I didn't keep going with it too far since I don't have both yarns I need. I'm not too happy with the increases (I switched to kfb after about 3 rounds) as there is a small hole. I am going to play with that. What really freaked me out, though, was when I took it off the needles and the edges of the circle were ruffly. Really, really ruffly. I thought it should be lying pretty flat. Like your samples! What increase did you end up using?
I tried again, this time joining into a circle when I had just the cast on stitches. The hole was smaller than on the first try, but my piece was just as ruffly. I'll try circs next.
I like the Emily Ocker one best.
I'm glad to see I'm not the only one who had trouble with the centre hole! I started mine about five times before deciding that if I just weave the end in upon completion, I'll be able to hide any real problem.
Re: your comments about it being ruffly, mine had a similar problem but now that the whole thing's much larger I don't think it will be apparent in the finished garment.
I'm almost up to the armholes now and I was interested to see comments about the sizing on other blogs. So far I think the sizing looks about right and the tension is about what it should be.
If only I'd known about the simplified version before I started I probably would have opted for that one... but I don't think I could bear to pull it apart and start again:-(
Post a Comment